NOTE: To use the Smart Tags feature your app will need to be updated to Version 3.3 or newer (iOS and Android).
What are Rocketbook Smart Tags?
Smart Tags are custom tags you create and assign to the scans you take in the Rocketbook app. The Smart Tags you create allow for faster recall and seamless organization of your scans, both within the app History Screen and in the destinations to which you send your files. This allows for harmonious coordination from the Rocketbook App to your favorite cloud storage options.
How do I use Rocketbook Smart Tags?
Creating and Assigning Tags:
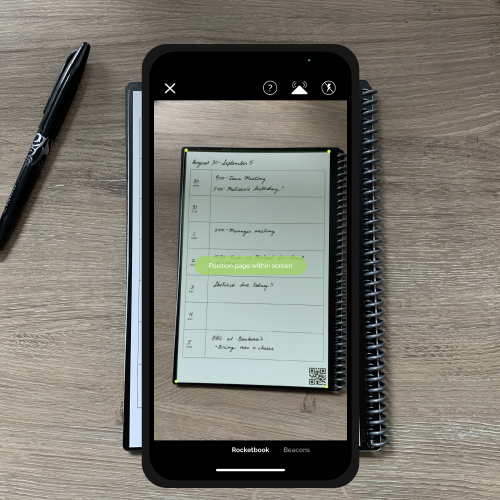
To create a new tag, you’ll first need to select a scan to which you’d like to assign it. There are currently three ways you can assign a new tag to a scan:
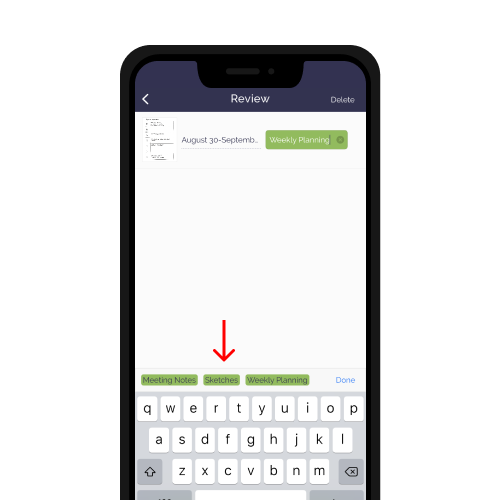
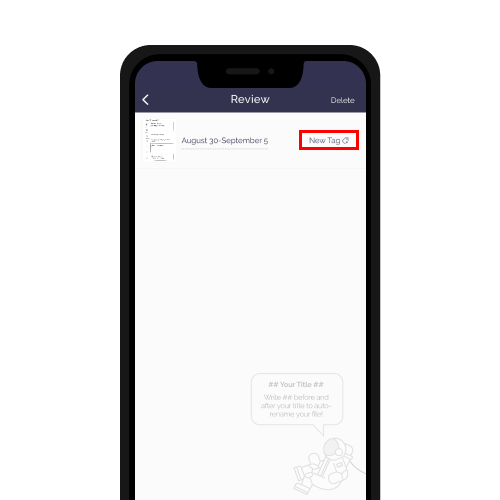
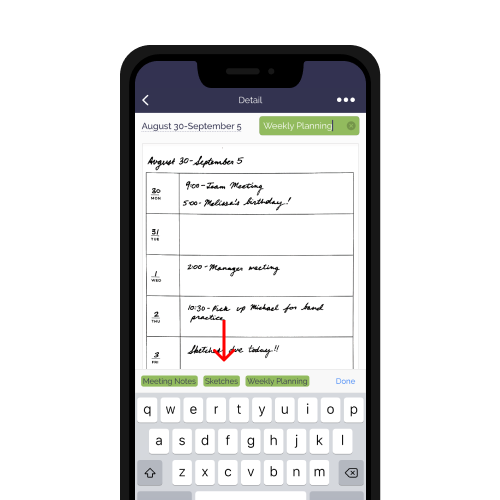
- Review Screen: Scan a Rocketbook Page and on the Review Screen, select the ‘New Tag’ button. From there, you’ll be able to either type in the name of a new tag or select a previously created tag from the horizontal tag menu above the keyboard!
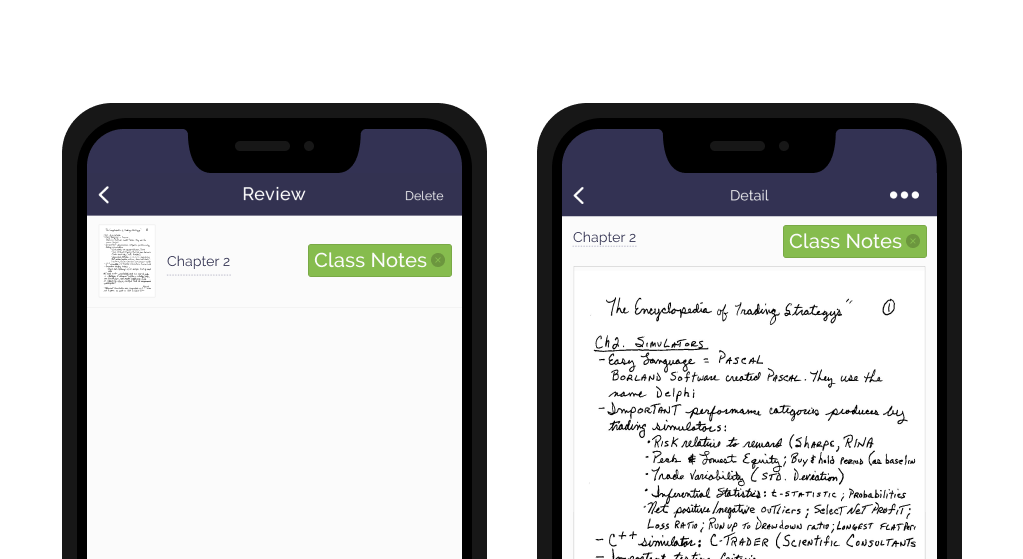
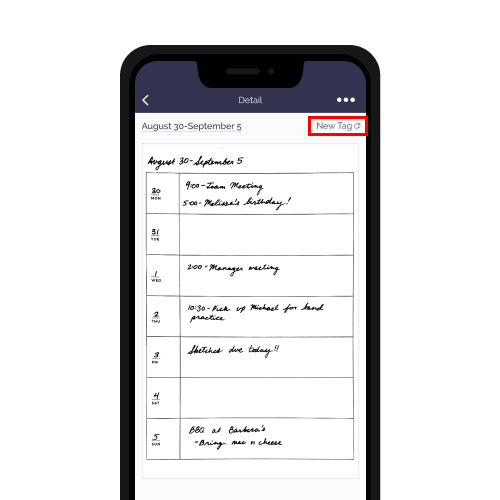
- Detail Screen: Select a scan on the History Screen and on the Detail Screen, select the ‘New Tag’ button in the top right of the page. From there, you’ll be able to either type in the name of a new tag or select a previously created tag from the horizontal tag menu above the keyboard!
- The Smart Tag Box (with OCR): Currently exclusive to Rocketbook Pro pages, the Smart Tag box allows you to write your desired tag in the box labeled tag along the bottom of the page, aside the destination symbols. To utilize this feature, you will need to enable OCR for Smart Tags in your app settings. To do so, head to App Settings > Handwriting Recognition (OCR) > Toggle the option for Smart Tags [ON].
Edit a Tag:
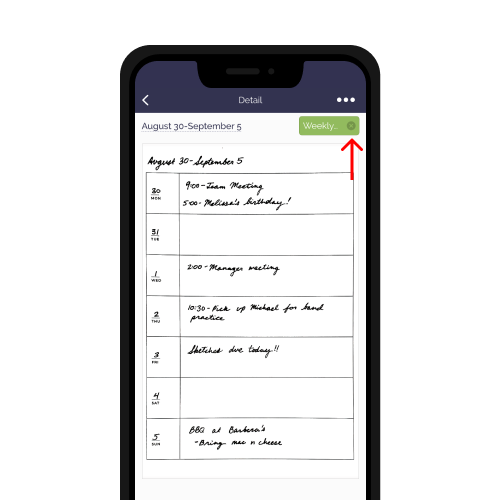
To edit a tag in both the Review Screen and the Detail Screen, tap the green button that contains the old tag and you can start editing the text with the keyboard or select one of the previously created tags on the horizontal tag menu above the keyboard to use it in place of the original tag.
Filter by Tag(s):
Applying Smart Tags allows you to filter your history screen to view only scans with certain tags assigned.
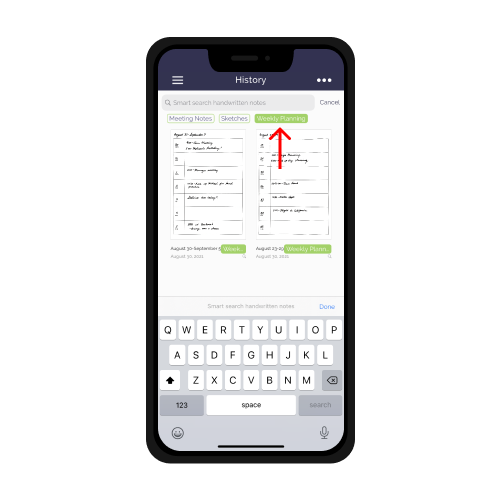
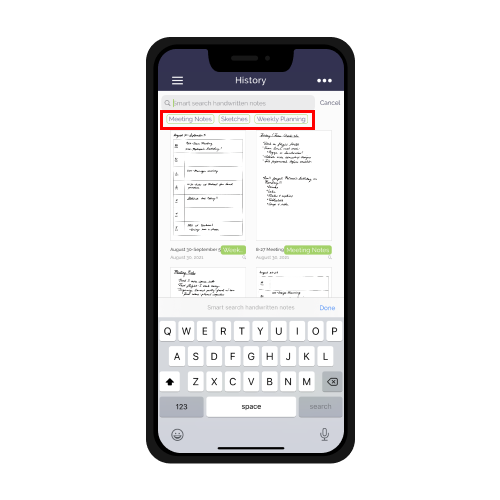
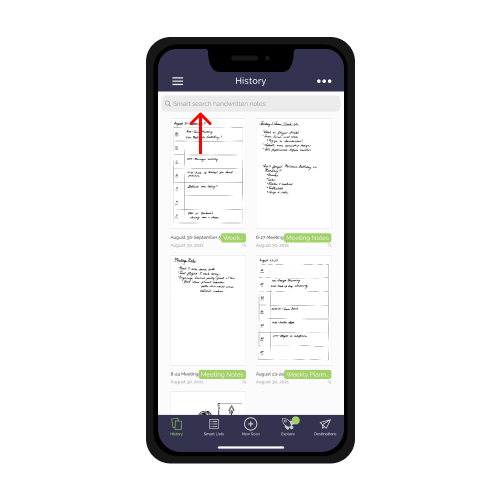
To filter by a singular tag or multiple tags, select the search bar that says ‘Smart search handwritten notes’ at the top of the History Screen and use the scrolling, horizontal tag menu below the search bar to find the tag/tags that you want to filter by (sorted a-z) and select the tags to trigger the live filter. Once choosing one or multiple tags, you should see the tags turn green, and your History Screen will only display scans that have been assigned the tags you selected!
To clear your filters, you can either unselect the tags individually or tap cancel.
Remove a Tag:
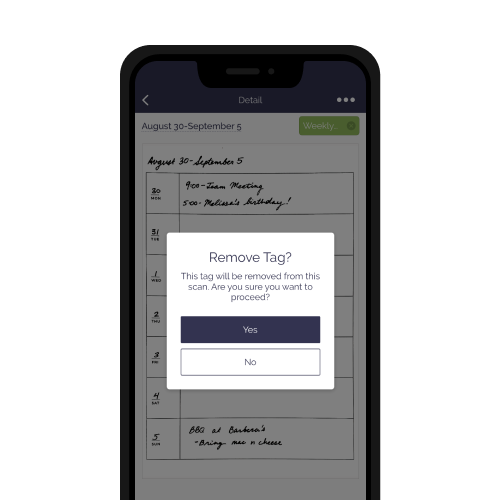
To remove a tag in both the Review and Detail Screen, select the small ‘X’ button on the right side of the green Smart Tags box. Once selecting the ‘X’ in the Smart Tag box, you will be asked if you are sure you want to remove the tag from the scan. Tap ‘Yes’ and the tag will be removed from that scan. The tag will not be deleted from other scans.
Delete a Tag:
If you’ve made a mistake or just want to get rid of some old tags that you no longer use, you’ll have the option to permanently delete tags right from within the app.
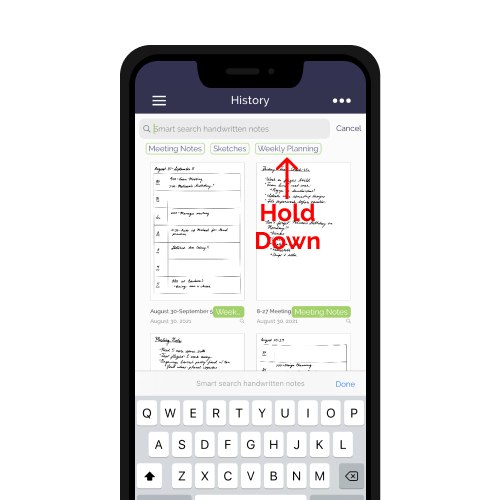
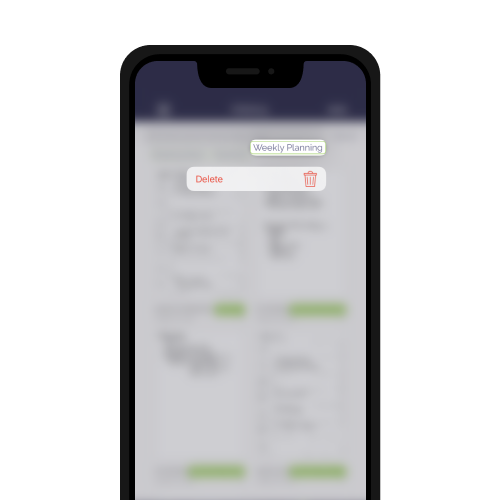
To delete a tag, tap on the search bar that says ‘Smart search handwritten notes’ atop of the History Screen to pull up your list of existing tags. Horizontally scroll to the tag you wish to delete, then press and hold on that tag; a red ‘Delete’ button will appear on your screen. Once you select the ‘Delete’ button, you will be asked if you are sure you want to delete the tag from existence. Tap ‘Yes’ to delete the tag. Note: This will delete and remove the tag from ALL scans within the Rocketbook app, this cannot be undone.

How do Smart Tags Function When Sending Scans?
Smart Tags can be integrated directly into the destinations you set within the Rocketbook app. You’ll be able to toggle whether or not Smart Tags are applied outside of the Rocketbook app when you send your files in the individual settings for each destination you set. These options will vary slightly between different destinations. depending on the capabilities of each destination type.
Destinations with Direct Smart Tags Integration (Evernote, Box, and Trello)
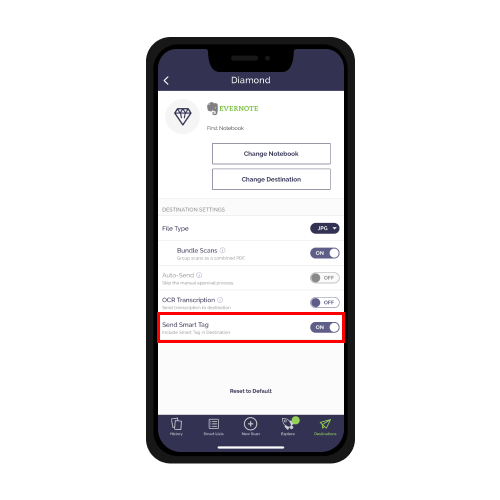
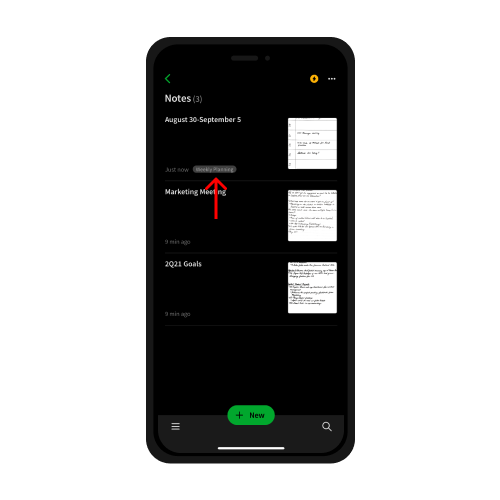
Evernote, Box, and Trello destinations will allow your Smart Tags to be recognized as tags within those application’s native tagging systems. For these integrated destinations, you have one setting that you can turn on or off for Smart Tags.
Send Smart Tag: This setting will allow you to decide to have the Smart Tag show up as a tag in the integrated destination. These tags will appear just as any other tag you may have used in those destinations:
Destinations without Direct Smart Tags Integration
Email:
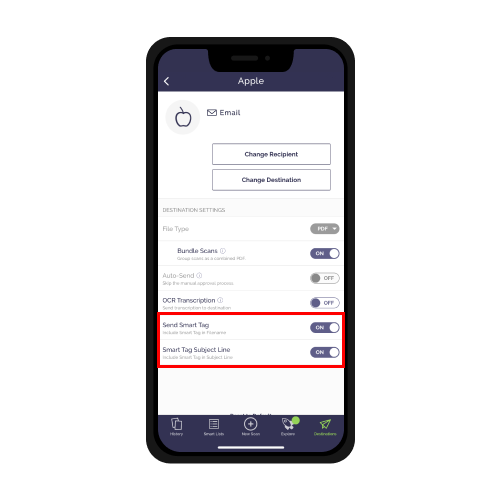
For email destinations, you have two settings that you can turn on or off for Smart Tags.
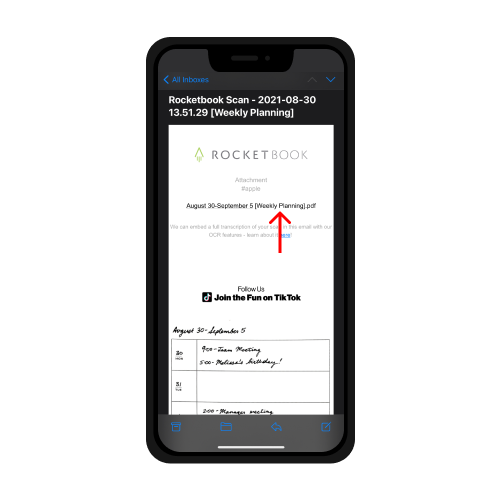
Send Smart Tag: This setting will allow you to append the assigned Smart Tag to the end of the filename of the scan.
Example:
If you had a scan named ‘Day1Notes.pdf’ and assigned it a tag ‘Bio,’ with this setting toggled on, your file will be renamed ‘Day1Notes[Bio].pdf’ so that you can search it easily in your email inbox!
Smart Tag Subject Line: This setting will allow you to include the assigned Smart Tag at the end of your email subject line.
Example:
If you had a scan named ‘Day1Notes.pdf’ and assigned it a tag ‘Bio,’ with this setting toggled on, the subject line of the email would become ‘Rocketbook Scan - 2021 - 09 - 02 13.02.10 [Bio]’ so that you can see/search for the tag in the subject line of the email.
All Other Unintegrated Destinations:
All other destination types (Google Drive, OneNote, OneDrive, DropBox, Slack, iMessages, iCloud, and Google Photos) will have one Smart Tags option that you can turn on or off in your destination settings.
Send Smart Tag: This setting will allow you to append the assigned Smart Tag to the end of the filename of the scan.
Example:
If you had a scan named ‘Day1Notes.pdf’ and assigned it a tag ‘Bio,’ with this setting toggled on, your file will be renamed ‘Day1Notes[Bio].pdf’ so that you can search for and easily locate your file after you’ve uploaded it

Please note that to use the Smart Tags feature your app will need to be updated to Version 3.3 or newer (iOS and Android).
For additional questions or assistance, please email us at hello@getrocketbook.com
Follow us: Facebook | Instagram | Twitter | LinkedIn | YouTube
Comments
0 comments
Article is closed for comments.